Nikon D5200 User Manual: A Comprehensive Guide
Welcome! This detailed manual unlocks the full potential of your Nikon D5200, offering a complete exploration of its features and functions for optimal photography.
Congratulations on choosing the Nikon D5200, a powerful and versatile Digital Single-Lens Reflex (DSLR) camera designed to elevate your photographic journey. This user manual serves as your comprehensive guide, meticulously crafted to help you understand and effectively utilize every aspect of this remarkable device. Whether you’re a seasoned photographer or just beginning to explore the world of digital imaging, the D5200 offers a blend of advanced technology and user-friendly operation.
This manual will walk you through the camera’s features, from basic setup and shooting modes to advanced customization options. We’ll cover everything from understanding exposure controls and focusing techniques to mastering white balance and image quality settings. Prepare to unlock your creative potential and capture stunning images with the Nikon D5200!
Key Features and Specifications
The Nikon D5200 boasts a 24.2-megapixel DX-format CMOS sensor, delivering exceptional image clarity and detail. It features a 3.0-inch tilting LCD screen for comfortable viewing from various angles, and 1080p Full HD video recording capability at up to 60 frames per second. Its 39-point autofocus system ensures sharp and accurate focus, even on moving subjects.
Connectivity options include built-in Wi-Fi for easy image sharing and remote control via smartphone or tablet. The camera supports ISO sensitivities from 100 to 6400, expandable to 25600, providing excellent low-light performance. It also offers a continuous shooting speed of up to 5 frames per second. The D5200 is compatible with a wide range of NIKKOR lenses, expanding your creative possibilities.
What’s in the Box?
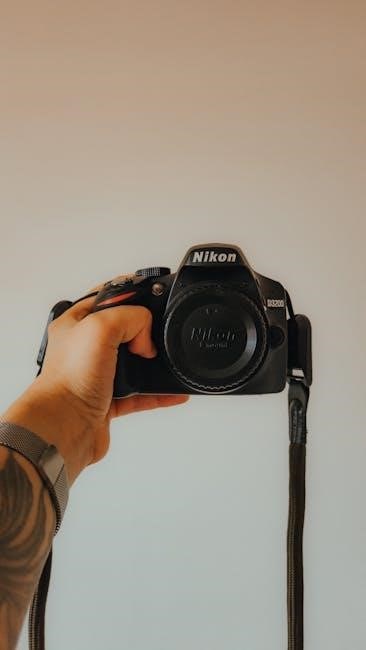
Upon opening your Nikon D5200 package, you’ll find the D5200 digital SLR camera body itself, ready for your photographic adventures. Included is the standard Nikon AF-P DX NIKKOR 18-55mm f/3.5-5.6G VR lens, a versatile option for everyday shooting. You’ll also receive a battery and charger to power your camera, ensuring you’re always ready to capture moments.
Essential accessories are also provided: a USB cable for transferring images to your computer, and an HDMI cable for connecting to a television or monitor. A strap is included for comfortable carrying, and a comprehensive user manual guides you through all the camera’s features. Finally, you’ll find body cap, lens cap, and relevant documentation for registration and warranty information.
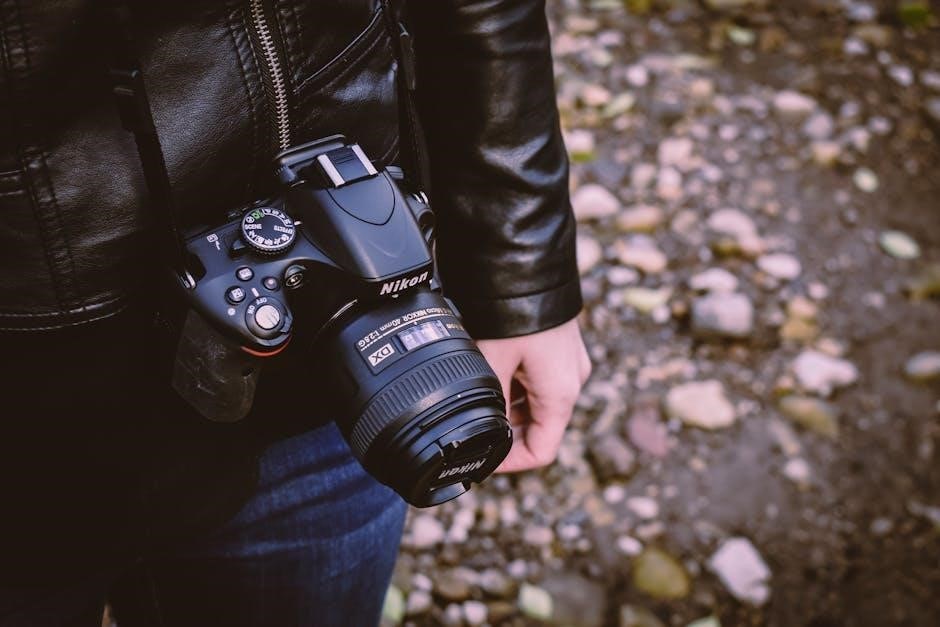
Camera Body Overview
The Nikon D5200 boasts a robust and ergonomically designed body, crafted for comfortable handling during extended shooting sessions. Its textured grip provides a secure hold, while the strategically placed buttons and dials offer intuitive control. The camera features a bright 3.0-inch tilting LCD screen, facilitating easy viewing from various angles – perfect for creative compositions.
On top, you’ll find the mode dial, shutter button, and control dials for adjusting settings. The rear panel houses the LCD screen, menu buttons, and directional pad for navigating the camera’s functions. The bottom of the camera includes the battery compartment and memory card slot. Familiarizing yourself with these key components will significantly enhance your shooting experience and unlock the D5200’s full potential.
4.1 Front Panel Controls
The Nikon D5200’s front panel primarily houses controls related to lens operation and focusing. You’ll find the lens release button, allowing for quick lens changes. Adjacent to this is the depth-of-field preview button, enabling you to visualize the effect of your chosen aperture on the final image. The autofocus-area mode selector lets you choose between single-point, dynamic-area, and auto-area AF.
Furthermore, the AF-assist beam emitter aids focusing in low-light conditions; The function (Fn) button provides customizable access to frequently used settings. Understanding these controls is crucial for precise focusing and achieving desired depth of field, ultimately enhancing your photographic control and creative expression.
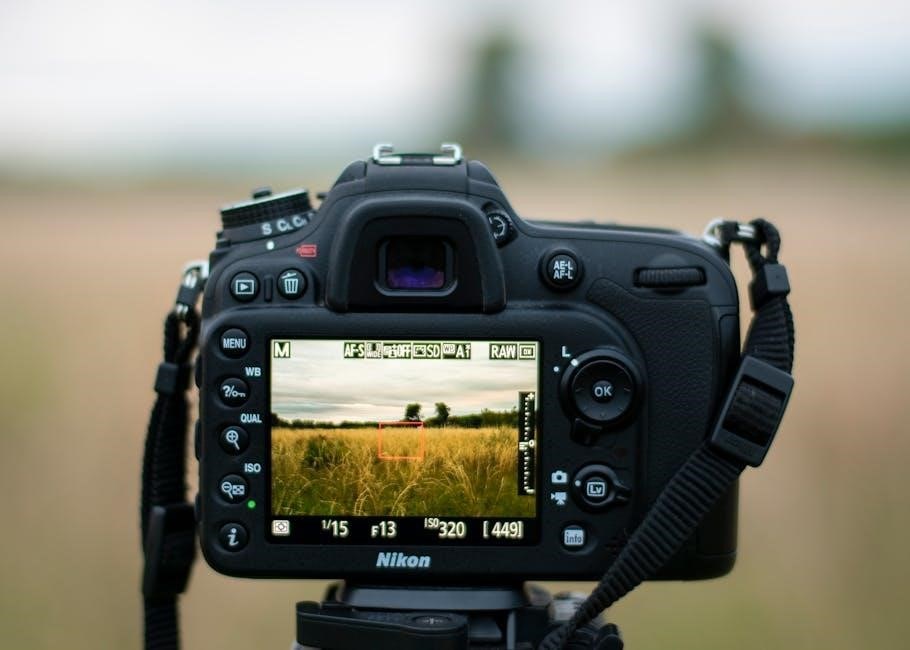
4.2 Rear Panel Controls
The rear panel of the Nikon D5200 is densely populated with controls for navigating menus, reviewing images, and adjusting camera settings. The prominent LCD screen serves as your viewfinder and display for reviewing captured photos and videos. The directional pad with central OK button facilitates menu navigation and setting adjustments. The ‘i’ button grants quick access to frequently used settings.
Dedicated buttons for playback, menu access, and image quality/size are also present. The viewfinder diopter adjustment dial ensures clear viewing for users with varying eyesight. The Live View button activates Live View shooting, while the video record button initiates video recording. Mastering these controls unlocks efficient camera operation and customization.
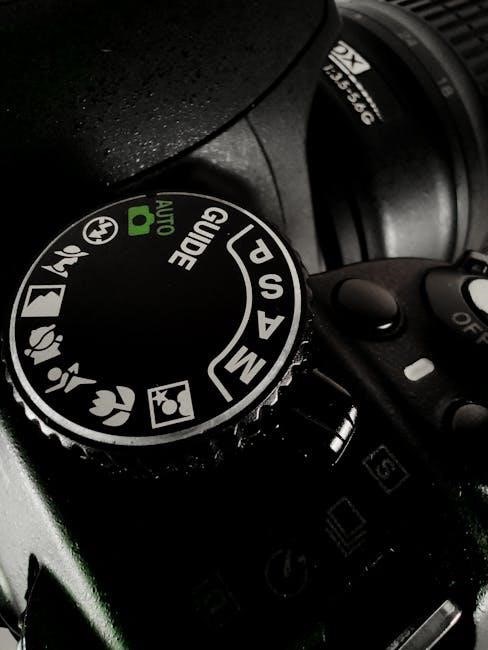
4;3 Top Panel Controls
The Nikon D5200’s top panel houses essential controls for shooting and camera operation. The mode dial allows quick selection of shooting modes – Auto, Scene, Program, Shutter-priority, Aperture-priority, and Manual. The on/off switch, combined with the shutter button, powers the camera on and initiates image capture. The exposure compensation dial enables adjustments to image brightness.
A dedicated button activates the built-in flash, offering control over flash settings. The ISO button provides direct access to ISO sensitivity adjustments, crucial for low-light photography. The metering mode button allows selection of metering methods for accurate exposure. Understanding these top panel controls is fundamental for efficient and creative photography with the D5200.
4.4 Bottom Panel & Compartments
The Nikon D5200’s bottom panel features the tripod socket, essential for stable long-exposure photography and video recording. A crucial compartment houses the battery, ensuring reliable power for extended shooting sessions. Adjacent to the battery is the memory card slot, compatible with SD cards for storing your photos and videos.
A protective cover safeguards these compartments from dust and moisture. It’s important to use a compatible SD card and ensure the battery is securely inserted. Proper handling of these compartments is vital for maintaining the camera’s functionality and protecting your valuable images. Always exercise caution when accessing these areas to prevent damage.
Setting Up the Camera
Initial setup is key to enjoying your Nikon D5200. Begin by inserting a compatible SD memory card into the designated slot – this is where your photos and videos will be stored. Next, install the battery, ensuring it clicks securely into place. Power on the camera and follow the on-screen prompts to configure essential settings.
These include selecting your preferred language, accurately setting the date and time, and choosing an appropriate shooting mode. Familiarize yourself with the menu system for future customization. Proper initial setup ensures optimal performance and a personalized shooting experience. Take your time and carefully review each step for a smooth start.
5.1 Inserting the Battery and Memory Card
Powering up and storing your images begins with correctly inserting the battery and memory card. Locate the battery compartment door on the bottom of the camera and slide it open. Insert the EN-EL14 battery, ensuring the contacts align, and push it in until it clicks. For the memory card, open the card slot cover (typically on the side) and insert a compatible SD card – SD, SDHC, and SDXC are supported.
Push the card in until it clicks, and close the cover. Always handle the memory card with care, avoiding static electricity. Confirm the battery indicator illuminates when the camera is powered on, and the memory card is recognized in the menu system.
5.2 Initial Camera Setup (Language, Date/Time)
Personalizing your D5200 starts with the initial setup. Upon first powering on, the camera will prompt you to select your preferred language. Use the multi-selector and OK button to navigate and confirm your choice. Next, accurately set the date and time. Correct date/time settings are crucial for proper image and video file organization and metadata.
You can choose to set the date/time manually or enable automatic setting via GPS if a compatible accessory is connected. Confirm your selections and proceed to the next setup step. Accurate initial settings ensure a smooth and personalized user experience from the outset.
5.3 Choosing a Shooting Mode (Auto, Scene, P, S, A, M)
The Nikon D5200 offers a versatile range of shooting modes to suit various skill levels and photographic situations. Auto mode simplifies operation for beginners, letting the camera handle all settings. Scene modes optimize settings for specific scenarios like portraits, landscapes, or sports. For more control, explore P (Program) mode, offering semi-automatic operation.
Advanced users can utilize S (Shutter-Priority) to control motion blur, A (Aperture-Priority) to manage depth of field, and M (Manual) mode for complete creative control over both aperture and shutter speed. Selecting the appropriate mode is fundamental to achieving desired photographic results. Experiment to discover what works best for you!
Understanding Shooting Modes
The Nikon D5200’s shooting modes provide varying levels of control, catering to diverse photographic needs. Auto mode is ideal for effortless point-and-shoot simplicity, perfect for beginners or quick snapshots. Scene modes intelligently adjust settings for specific subjects like landscapes, portraits, or night scenes, optimizing image quality.
P (Program) mode offers a balance, allowing some user control while the camera manages other settings. S (Shutter-Priority) lets you dictate shutter speed, crucial for capturing motion. A (Aperture-Priority) controls depth of field, influencing background blur. Finally, M (Manual) mode grants full creative authority over both shutter speed and aperture, enabling complete customization.
6.1 Auto Mode: Point-and-Shoot Simplicity
Auto mode on the Nikon D5200 is designed for ultimate ease of use, requiring minimal photographic knowledge. The camera automatically selects the optimal settings – aperture, shutter speed, ISO, and white balance – based on the scene it detects. This makes it perfect for casual shooting, everyday moments, or when you need a quick, reliable result without fussing with complex configurations.
Simply compose your shot, half-press the shutter button to focus, and fully press to capture the image. Auto mode excels in well-lit conditions, but also performs admirably in lower light, utilizing built-in flash when necessary. It’s a fantastic starting point for new photographers and a convenient option for experienced users seeking speed and simplicity.

6.2 Scene Modes: Optimizing for Specific Situations
Scene Modes on the Nikon D5200 offer pre-configured settings tailored to common shooting scenarios, enhancing image quality without manual adjustments. These modes include Portrait, Landscape, Sports, Close-up, Night Portrait, and more. Each mode optimizes camera settings like aperture, shutter speed, ISO, and white balance to best suit the selected scene.
For example, Portrait mode blurs the background for a pleasing bokeh effect, while Landscape mode prioritizes sharpness and vibrant colors. Sports mode utilizes faster shutter speeds to freeze action. Utilizing Scene Modes allows you to achieve professional-looking results even without extensive photographic expertise, providing a convenient pathway to better images in diverse conditions.

6.3 P (Program) Mode: Semi-Automatic Control
Program (P) Mode on the Nikon D5200 strikes a balance between automatic convenience and manual control. The camera automatically selects an appropriate aperture and shutter speed combination based on the lighting conditions, but allows the photographer to adjust other settings like ISO, white balance, and exposure compensation.
This mode is ideal for situations where you want some creative control without the complexity of fully manual settings. You can shift the program, effectively altering both aperture and shutter speed simultaneously, to achieve desired effects like motion blur or increased depth of field. P mode offers a stepping stone towards mastering more advanced shooting techniques, providing flexibility and creative freedom.
6.4 S (Shutter-Priority) Mode: Controlling Motion
Shutter-Priority (S) Mode on your Nikon D5200 grants you direct control over the shutter speed, while the camera automatically adjusts the aperture to achieve proper exposure. This mode is exceptionally useful for capturing motion – either freezing it with fast shutter speeds or blurring it to convey a sense of movement.
For sports or wildlife photography, a fast shutter speed (e.g., 1/500s or faster) will freeze action. Conversely, a slower shutter speed (e.g., 1/30s or slower) can create motion blur, perfect for waterfalls or light trails. Remember to consider the impact of shutter speed on image brightness and potential camera shake; a tripod may be necessary for slower speeds.
6.5 A (Aperture-Priority) Mode: Controlling Depth of Field
Aperture-Priority (A) Mode on the Nikon D5200 empowers you to dictate the aperture setting, influencing the depth of field – the area of your image that appears sharp. The camera then automatically selects the appropriate shutter speed for correct exposure. A wider aperture (lower f-number, like f/1.8) creates a shallow depth of field, ideal for portraits with blurred backgrounds, isolating your subject beautifully.
Conversely, a narrower aperture (higher f-number, like f/16) yields a greater depth of field, ensuring sharpness throughout the entire scene, perfect for landscapes. Understanding the relationship between aperture and depth of field is crucial for creative control over your images, allowing you to emphasize specific elements and create visually compelling photographs.
6.6 M (Manual) Mode: Full Control
Manual (M) Mode on your Nikon D5200 grants you complete authority over both aperture and shutter speed, offering the ultimate creative freedom. This mode requires a solid understanding of the exposure triangle – the interplay between aperture, shutter speed, and ISO. You independently set these values to achieve your desired exposure and artistic effect.
Manual mode is invaluable in challenging lighting conditions where automatic modes may struggle, such as low-light scenarios or when shooting with strong backlighting. It allows for precise control over motion blur and depth of field, enabling you to fully realize your photographic vision. Mastering Manual mode unlocks the full potential of your D5200.
Focusing and Autofocus Settings
Achieving sharp images with your Nikon D5200 relies on understanding its focusing capabilities. The camera offers several Autofocus (AF) modes tailored to different shooting scenarios. AF-S (Single) is ideal for stationary subjects, locking focus when the shutter button is half-pressed. AF-C (Continuous) tracks moving subjects, continuously adjusting focus as they move – perfect for sports or wildlife.
AF-A (Auto) intelligently switches between AF-S and AF-C, attempting to determine the best mode automatically. Furthermore, explore Focus Area Modes: Single-Point AF allows precise focus selection, Dynamic-Area AF uses surrounding points to track moving subjects, and Auto-Area AF lets the camera choose the focus point.

7.1 Autofocus Modes (AF-S, AF-C, AF-A)
Nikon D5200’s autofocus system provides three primary modes to suit various shooting conditions. AF-S (Single Autofocus) is best for still subjects; the camera focuses once when you half-press the shutter release, and remains locked until you release or recompose. AF-C (Continuous Autofocus) excels with moving subjects, continuously adjusting focus as they change position – ideal for action photography.
AF-A (Auto Autofocus) attempts to automatically select between AF-S and AF-C, analyzing the scene to determine the most appropriate mode. This is a good starting point for general photography, but mastering AF-S and AF-C provides greater control. Experiment with each mode to understand their strengths and weaknesses for optimal results;
7.2 Focus Area Modes (Single-Point, Dynamic-Area, Auto-Area)
The Nikon D5200 offers several Focus Area Modes, dictating how the autofocus system selects the focus point. Single-Point AF allows you to manually choose a single focus point, providing precise control over where the camera focuses – perfect for static subjects requiring accuracy. Dynamic-Area AF uses a cluster of focus points around your selected point, tracking moving subjects within that area.
Auto-Area AF lets the camera automatically select focus points across the entire frame, suitable for general photography where precise focus point selection isn’t critical. Understanding these modes empowers you to optimize focus for different scenarios, ensuring sharp and well-defined images. Experiment to find what works best for your style!
Exposure Control
Exposure control is fundamental to photography, determining the brightness and overall look of your images. The Nikon D5200 provides comprehensive control over exposure through ISO sensitivity, metering modes, and aperture/shutter speed adjustments. ISO controls the camera’s sensitivity to light; higher ISOs are useful in low light but can introduce noise.
Metering modes – Matrix, Center-Weighted, and Spot – dictate how the camera measures light in the scene. Mastering these settings allows you to achieve properly exposed photos in various lighting conditions, ensuring detail in both highlights and shadows. Experimenting with these controls unlocks creative possibilities and ensures consistently excellent results.
8.1 ISO Sensitivity Settings
ISO sensitivity determines how much the camera’s sensor reacts to light. Lower ISO settings (like 100 or 200) are ideal for bright conditions, producing cleaner images with minimal noise. As light decreases, increasing the ISO (e.g., 800, 1600, or higher) makes the sensor more sensitive, allowing for faster shutter speeds and proper exposure.
However, higher ISOs introduce digital noise, appearing as graininess in your photos. The Nikon D5200 allows ISO settings from 100 to 6400, with a boost option to 25600. Understanding the trade-off between brightness and noise is crucial for achieving optimal image quality in diverse shooting scenarios. Experiment to find the highest usable ISO for your needs.
8.2 Metering Modes (Matrix, Center-Weighted, Spot)
Metering modes dictate how the camera evaluates light to determine the correct exposure. Matrix metering (the default) analyzes the entire scene, providing a balanced exposure suitable for most situations. Center-weighted metering prioritizes the center of the frame, useful when your subject is centrally located and you want to ensure it’s properly exposed.
Spot metering measures light from a very small area, ideal for challenging lighting where you need precise control over exposure, like backlit subjects. Selecting the appropriate mode ensures accurate exposure, preventing underexposed or overexposed images. Experiment with each mode to understand their effects in different scenarios and master your camera’s exposure capabilities.
White Balance
White balance (WB) corrects color casts caused by different lighting conditions, ensuring accurate color reproduction in your photos. The Nikon D5200 offers several preset WB options, including Auto (for general use), Incandescent, Fluorescent, Sunny, Cloudy, and Flash.
Custom WB allows you to manually set the white balance using a white or gray card for ultimate accuracy. Incorrect WB settings can result in images appearing too warm (yellowish) or too cool (bluish). Understanding and utilizing WB settings is crucial for achieving natural-looking colors and enhancing the overall quality of your photographs, especially in varied lighting environments.
Image Quality and Size Settings
Image quality determines the level of compression applied to your photos, impacting file size and detail. The Nikon D5200 offers RAW (uncompressed, maximum detail – ideal for editing), Large, Medium, and Small JPEG options. Image size dictates the resolution, measured in pixels. Higher resolutions (e.g., Large: 6000 x 4000 pixels) are suitable for large prints and cropping, while lower resolutions are sufficient for web use.
Choosing the right settings balances file size and image quality. RAW files offer maximum flexibility but require post-processing. JPEGs are convenient for immediate use but involve some data loss. Consider your intended use when selecting these crucial settings.

Using Live View
Live View on the Nikon D5200 allows you to compose and review images using the rear LCD screen, rather than the optical viewfinder. Activate it by flipping the LCD screen out and selecting ‘Live View’ in the shooting menu, or using the dedicated Live View button. This mode is particularly useful for precise focusing, especially when using a tripod, and for shooting from awkward angles.
In Live View, you can utilize features like focus peaking to visually highlight areas in focus, and histogram display to assess exposure. Be mindful that prolonged Live View use can lead to sensor heating, potentially affecting image quality.
Video Recording
The Nikon D5200 captures Full HD 1080p video at frame rates of 24, 25, or 30 frames per second. Initiate video recording by switching to the ‘Movie’ mode on the mode dial. You can control exposure settings manually or allow the camera to adjust automatically. Remember to insert a compatible SD card with sufficient storage and write speed for video files.
During recording, you can utilize autofocus, but performance may vary. External microphones can be connected via the microphone jack for improved audio quality. The D5200 offers features like wind noise reduction and manual audio level control. Review recorded videos on the LCD screen and transfer them to a computer for editing.
Menu Navigation and Customization
The Nikon D5200 features a comprehensive menu system accessed via the ‘Menu’ button on the rear panel. Navigate using the directional pad and confirm selections with the ‘OK’ button. The menu is logically organized into categories: Setup, Shooting, Custom Settings, and Retouch. Explore these sections to personalize your camera experience.
Custom Settings allow you to tailor button functions, display settings, and autofocus behavior to your preferences. You can create and save custom picture control profiles for different shooting scenarios. Regularly reviewing the menu options will unlock advanced features and optimize the D5200 for your specific photographic style, enhancing overall usability.