Mens Shoes Guide: A Comprehensive Overview (Updated September 1, 2026)
This guide meticulously details essential mens shoe styles, covering formal, semi-formal, and casual options, ensuring you confidently navigate footwear choices for any occasion.
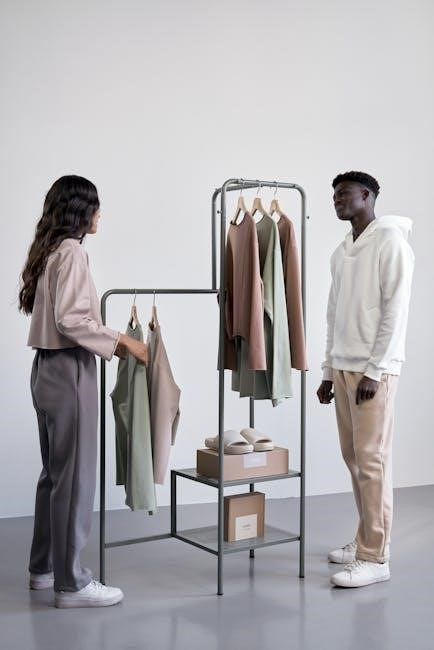
Understanding different shoe styles is fundamental to building a versatile wardrobe. Whether dressing for business, weekend outings, or special events, the right footwear elevates your entire look. This guide explores crucial categories and styles every man should recognize.
The world of mens shoes presents countless options, but mastering the basics is key. Mens shoe styles aren’t just about types like oxfords or sneakers; they reflect mood, confidence, and personality. A shoe’s silhouette and detailing determine if an outfit feels sharp, relaxed, or bold.
This article focuses on style, helping you utilize various types to express yourself. A comprehensive mens footwear guide classifies shoe types, styles, and appropriate occasions, encompassing formal, semi-formal, and casual options, each serving distinct purposes.
Formal Shoe Styles
Formal shoes represent the cornerstone of a sophisticated wardrobe, essential for business settings, weddings, and other distinguished occasions. These styles prioritize classic designs and refined materials, projecting an image of elegance and respectability. Key types include Oxfords, Derby shoes, Monk Straps, and Loafers – each offering a unique interpretation of formality.
Selecting the correct formal shoe hinges on the event’s dress code. Oxfords, renowned for their closed lacing system, are the most formal option. Derby shoes, with their open lacing, provide a slightly more versatile alternative. Monk Straps introduce a touch of flair, while Loafers, though traditionally casual, can be elevated for semi-formal events with the right pairing.
Oxfords: The Classic Choice
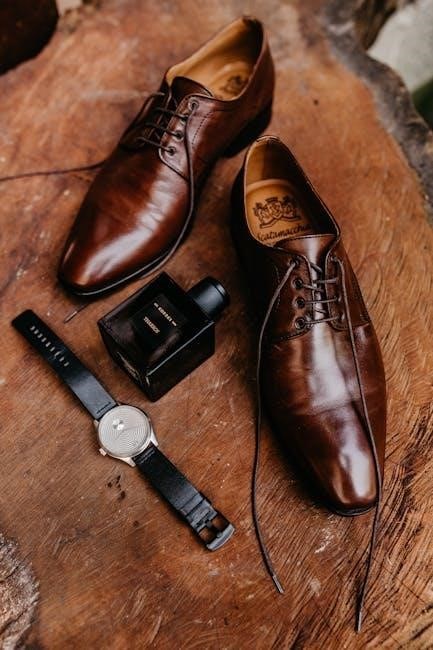
Oxfords stand as the epitome of formal footwear, instantly elevating any ensemble with their timeless sophistication. Characterized by a closed lacing system – where the shoe’s facing is stitched under the vamp – they present a sleek, streamlined silhouette. Traditionally crafted from leather, Oxfords exude quality and durability.
The versatility of Oxfords lies in their adaptability. Black Oxfords are the most formal, ideal for black-tie events and professional settings. Brown Oxfords offer a slightly more relaxed, yet still polished, option suitable for business casual environments. Cap-toe Oxfords are a classic choice, while wholecut Oxfords represent the height of minimalist elegance.
Derby Shoes: A Versatile Alternative
Derby shoes offer a slightly more relaxed, yet equally stylish, alternative to Oxfords. The key distinction lies in their open lacing system – the facing is stitched over the vamp – creating a more comfortable and adaptable fit. This construction makes Derby shoes a versatile choice for a wider range of occasions.
Often considered a good starting point for building a shoe wardrobe, Derby shoes pair well with both suits and more casual attire like chinos and jeans. They are available in various materials, including leather and suede, and in a spectrum of colors, from classic black and brown to bolder shades. Their adaptable nature makes them a cornerstone of modern menswear.
Monk Strap Shoes: Adding a Touch of Flair
Monk strap shoes distinguish themselves with their unique buckle closures, offering a sophisticated and distinctive alternative to laced footwear. Typically featuring one or double straps, these shoes exude a refined aesthetic, injecting a touch of personality into any ensemble. They represent a confident departure from traditional shoe styles.
Versatile enough for both formal and smart-casual settings, monk strap shoes complement tailored trousers, chinos, and even dark-wash jeans. Leather is the most common material, available in various finishes and colors. Choosing the right buckle – silver or gold – can further enhance the overall look, making them a stylish and impactful choice.
Loafers: Comfort and Style Combined
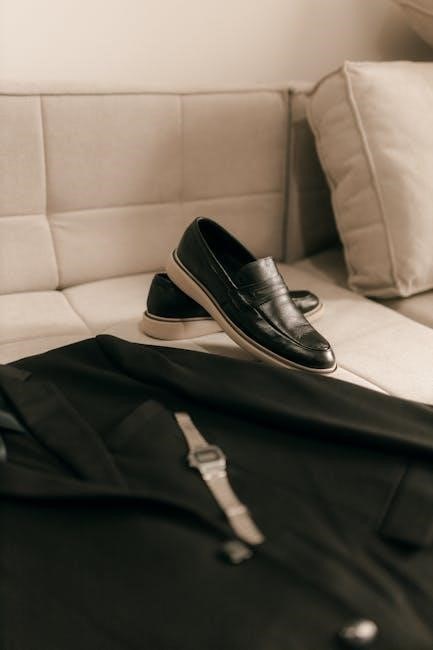
Loafers represent a harmonious blend of comfort and sophistication, making them a cornerstone of any well-rounded wardrobe. Characterized by their slip-on design and low heel, they offer effortless style without compromising on practicality. From penny loafers to tassel loafers and Belgian loafers, variations cater to diverse tastes and occasions.
These versatile shoes seamlessly transition from business-casual workplaces to relaxed weekend outings. They pair exceptionally well with chinos, trousers, and even shorts during warmer months. Leather loafers offer durability and a polished appearance, while suede options provide a softer, more casual vibe. A timeless choice, loafers consistently deliver both style and ease.
Semi-Formal Shoe Styles
Semi-formal shoe styles bridge the gap between strict formality and relaxed casualness, offering versatility for a range of events. These shoes are appropriate for occasions where a suit isn’t mandatory, but a polished appearance is still desired. Key examples include brogues and Chelsea boots, each bringing a unique aesthetic to the table.
Brogues, with their distinctive decorative perforations, add visual interest and a touch of personality. Chelsea boots, known for their sleek silhouette and elastic side panels, offer a sophisticated and modern look. Choosing the right semi-formal shoe depends on personal preference and the specific context of the event, allowing for stylish expression.
Brogues: Detailed and Distinguished
Brogues are instantly recognizable by their decorative perforations, or “broguing,” which historically served a practical purpose – allowing water to drain from shoes worn in damp conditions. Today, the broguing is purely aesthetic, adding a distinctive and sophisticated detail. However, a Brogue is a style of shoe, not a type, meaning broguing can appear on Oxfords, Derbies, and even boots.
Different levels of broguing define various types of brogues – full brogues, half brogues, and quarter brogues – each offering a different degree of ornamentation. They are considered semi-formal, making them suitable for business-casual settings and events where a polished, yet not overly strict, look is desired.
Wingtips: A Statement Brogue
Wingtips represent the most elaborate form of brogue, characterized by a pointed toe cap extending along the sides of the shoe, resembling wings – hence the name. This distinctive design element makes wingtips a bold and eye-catching choice, instantly elevating any outfit. They are always considered a type of brogue, showcasing extensive decorative perforations across the toe cap and along the sides.
While still falling into the semi-formal category, wingtips possess a more assertive personality than other brogue styles. They pair exceptionally well with suits, blazers, and even smart-casual ensembles, adding a touch of personality and flair. Choosing the right color and material can further refine the statement.
Chelsea Boots: Sleek and Sophisticated
Chelsea boots are ankle-high, close-fitting boots known for their elastic side panels. Originating in the Victorian era, they gained popularity in the 1960s and remain a timeless staple in modern menswear. Their streamlined silhouette and lack of laces contribute to a sleek, sophisticated aesthetic, making them incredibly versatile.
These boots effortlessly bridge the gap between formal and casual wear. They can be paired with suits for a contemporary look, or dressed down with jeans and a sweater for a more relaxed vibe. Leather and suede are common materials, offering varying degrees of formality. Chelsea boots are a stylish and practical choice for the discerning man.
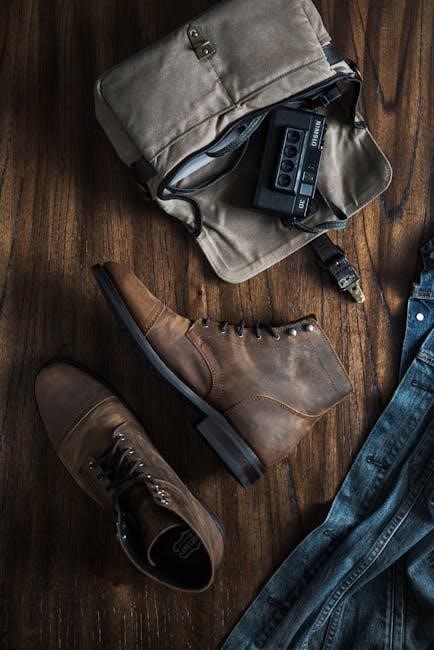
Casual Shoe Styles
Casual shoe styles prioritize comfort and versatility, offering a relaxed aesthetic suitable for everyday wear. This category encompasses a wide range of options, from the athletic appeal of sneakers to the preppy charm of boat shoes and the adaptable nature of chukka boots. These shoes are designed for leisure activities, weekend outings, and situations where a more laid-back appearance is desired.
The key to mastering casual footwear lies in selecting styles that complement your personal taste and lifestyle. Materials like canvas, suede, and leather are frequently used, providing both comfort and durability. Casual shoes are essential for building a well-rounded wardrobe, offering effortless style and all-day comfort.
Sneakers: Everyday Comfort
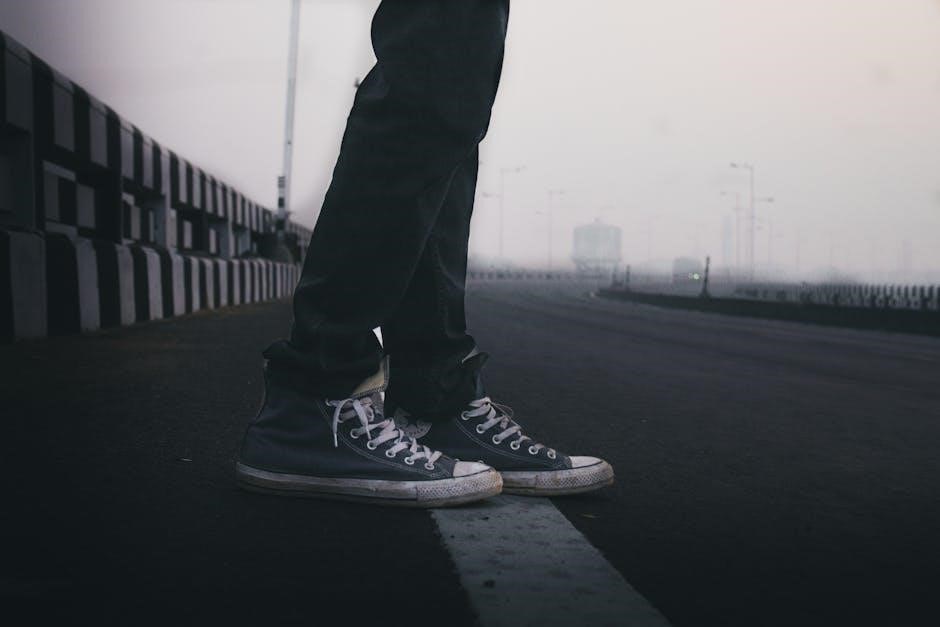
Sneakers represent the pinnacle of casual footwear, offering unparalleled comfort and versatility for daily wear. Originally designed for athletic pursuits, they’ve transcended their functional origins to become a fashion staple. From classic canvas designs to modern performance models, sneakers cater to diverse tastes and activities.
The evolution of sneakers has led to a vast array of styles, including low-tops, high-tops, and slip-ons. Materials range from breathable mesh to durable leather, ensuring both comfort and longevity. Pairing sneakers with jeans, chinos, or even tailored trousers demonstrates a contemporary approach to style, making them an indispensable part of any modern man’s wardrobe.
Boat Shoes: Summer Essential
Boat shoes embody relaxed summer style, originating from the needs of sailors for reliable, non-marking footwear on deck. Characterized by their moccasin construction, leather or canvas uppers, and siped rubber soles for traction, they’ve become synonymous with warm-weather leisure. Their practical design ensures grip on wet surfaces, while their aesthetic appeal makes them a versatile fashion choice.
Traditionally paired with shorts and a polo shirt, boat shoes now complement a wider range of outfits, including chinos and linen trousers. Available in various colors and materials, they offer a refined yet casual look. Investing in a quality pair of boat shoes is a smart move for any man seeking comfortable and stylish footwear during the warmer months.
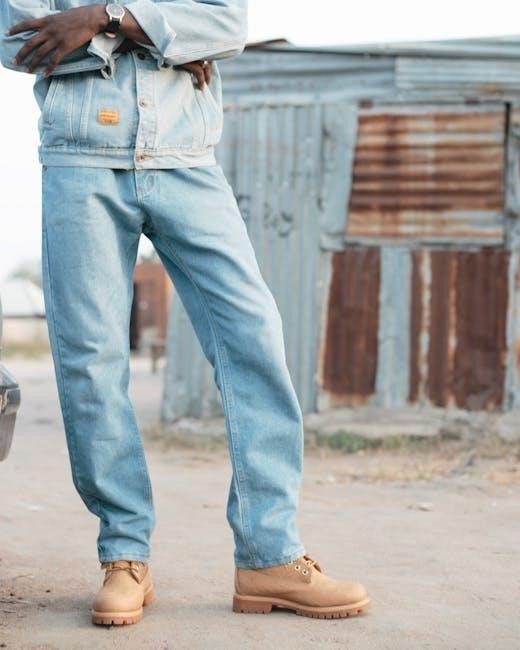
Chukka Boots: Versatile and Stylish
Chukka boots represent a harmonious blend of casual comfort and refined style, making them incredibly versatile additions to any wardrobe. Originating in South Africa, these ankle-high boots typically feature two to three eyelets and are crafted from suede or leather. Their simple, yet elegant design allows for seamless integration with diverse outfits, ranging from jeans and chinos to more dressed-up ensembles.
The adaptability of chukka boots stems from their understated aesthetic. They can be effortlessly paired with casual wear for a relaxed look or elevated with tailored trousers for a smart-casual vibe. Available in a spectrum of colors, from classic brown and tan to bolder shades, chukka boots offer a stylish solution for year-round wear.
Boot Styles for Men
Boot styles for men extend far beyond simple weather protection, representing a significant facet of personal style and practical functionality. From rugged work boots designed for demanding environments to adventurous hiking boots built for outdoor exploration, the options are diverse. Boots offer durability, support, and a distinct aesthetic that complements various wardrobes.
Beyond these core categories, men’s boot selections include Chelsea boots, chukka boots, and combat boots, each possessing unique characteristics and suitable occasions. Choosing the right boot depends on intended use, personal preference, and desired level of formality. Understanding the nuances of each style empowers men to confidently select footwear that aligns with their lifestyle and fashion sensibilities.

Work Boots: Durable and Practical
Work boots are engineered for demanding professions, prioritizing durability, protection, and comfort in challenging environments; Constructed from robust materials like leather and reinforced with steel or composite toes, they safeguard feet from impact and compression hazards. These boots often feature slip-resistant soles for enhanced traction on various surfaces, crucial for workplace safety.
Beyond safety features, work boots offer essential support for long hours on your feet, reducing fatigue and preventing injuries. Different styles cater to specific trades – from heavy-duty construction boots to lighter-weight options for electricians or mechanics. Investing in quality work boots is paramount for professionals seeking reliable and long-lasting footwear.
Hiking Boots: For Outdoor Adventures
Hiking boots are specifically designed to tackle varied terrains, providing essential support, traction, and protection for outdoor enthusiasts. Constructed with durable materials like leather or synthetic fabrics, they withstand rugged conditions and offer ankle support to prevent sprains. Key features include waterproof membranes to keep feet dry and aggressive lug patterns on the soles for superior grip on trails.
Choosing the right hiking boots depends on the type of hiking you plan to do – from lightweight day hikes to multi-day backpacking trips. Consider factors like boot height, cushioning, and weight to ensure optimal comfort and performance. Investing in quality hiking boots is crucial for enjoying safe and enjoyable adventures in nature.
Understanding Shoe Materials
Shoe materials significantly impact durability, comfort, and style. Leather shoes, renowned for their longevity and elegance, offer a classic look and mold to the foot over time, providing a personalized fit. However, they require regular maintenance. Suede shoes present a softer, more casual aesthetic, offering breathability but demanding greater protection against moisture and stains.
Synthetic materials, like nylon and polyester, are often lighter and more affordable, frequently used in athletic shoes. Rubber soles provide traction and cushioning, while canvas offers a lightweight, breathable option for warmer weather. Understanding these material properties allows informed decisions when building a versatile shoe collection.
Leather Shoes: Durability and Elegance
Leather shoes represent a cornerstone of any well-curated wardrobe, prized for their exceptional durability and timeless elegance. Full-grain leather, the highest quality, boasts natural markings and develops a rich patina with age, enhancing its character. Calfskin offers a softer, more refined appearance, ideal for formal settings. Proper care, including regular polishing and conditioning, extends the lifespan of leather shoes considerably.

Beyond aesthetics, leather provides excellent support and breathability. Investing in quality leather shoes is a long-term investment, offering both style and comfort for years to come. Different tanning processes influence the leather’s texture and resilience, impacting its suitability for various shoe styles.
Suede Shoes: Soft and Stylish
Suede shoes offer a distinctly refined yet relaxed aesthetic, characterized by their soft, velvety texture. Created from the underside of animal hides, suede provides a luxurious feel and a unique visual depth. While incredibly stylish, suede requires more diligent care than traditional leather, being susceptible to water damage and staining.
Regular brushing with a suede brush helps maintain its nap and prevent matting. Protective sprays are essential for shielding against moisture and dirt. Suede is particularly well-suited for loafers, chukka boots, and desert boots, adding a touch of sophistication to casual outfits; Embrace the distinctive charm of suede, but prioritize its upkeep for lasting beauty.
Shoe Construction Methods
Shoe construction significantly impacts durability, comfort, and price. Several methods exist, each with unique benefits. Cemented construction, common in sneakers, involves gluing the sole to the upper – it’s flexible and affordable, but less durable. Blake stitching attaches the sole internally, offering flexibility and easier resoling than cementing.
However, the Goodyear welt stands out as a premium method. It involves stitching a leather welt to both the upper and the sole, allowing for multiple resolings and exceptional longevity. While more expensive, Goodyear welted shoes represent a worthwhile investment for those prioritizing quality and enduring style. Understanding these methods empowers informed purchasing decisions.
Goodyear Welted Shoes: Quality and Longevity
Goodyear welting is a robust shoe construction technique renowned for its durability and reparability. A leather welt—a strip of material—is stitched to both the upper and the insole rib. The outsole is then stitched to the welt, not directly to the upper. This creates a water-resistant barrier and allows for repeated resoling, extending the shoe’s lifespan considerably.
While more labor-intensive and therefore pricier, Goodyear welted shoes offer exceptional value over time. They mold to the wearer’s foot, providing increased comfort, and withstand harsh conditions. This method is a hallmark of high-quality footwear, favored by those seeking a lasting investment in both style and practicality.